

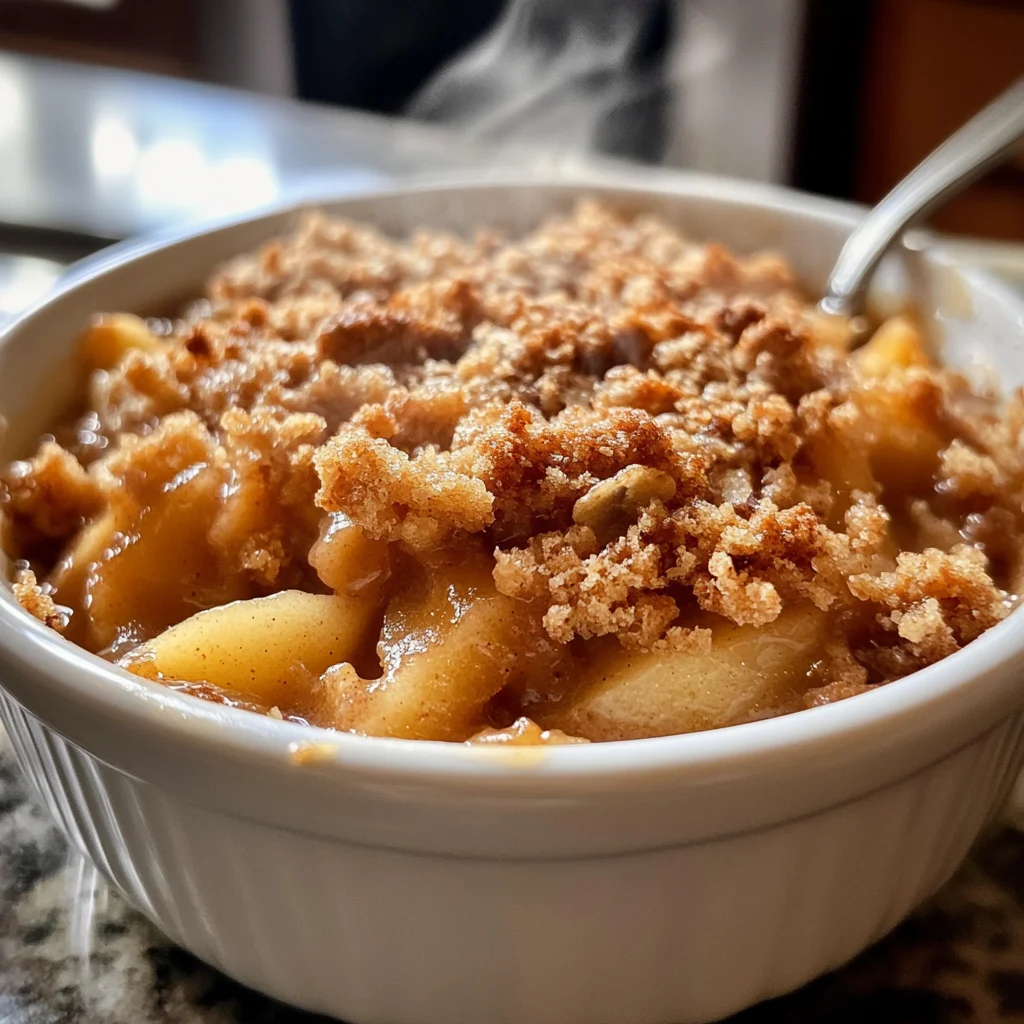
Mouthwatering Apple Crisp with Canned Apple Filling is a delightful dessert that brings the warmth of fall right into your kitchen. This easy-to-make apple crisp is perfect for family gatherings, potlucks, or even a cozy night in. The combination of sweet canned apple filling and a buttery oat topping creates a deliciously satisfying treat that is sure to impress. Plus, it’s a great way to enjoy the flavors of autumn without spending hours in the kitchen.
Why You’ll Love This Recipe
- Quick and Easy: With just a few simple ingredients, you can whip up this dessert in no time.
- Comforting Flavor: The warm cinnamon and sweet apple filling create a nostalgic taste that’s hard to resist.
- Versatile Serving Options: Serve it warm with ice cream or enjoy it as-is; it’s delightful either way!
- Perfect for Any Occasion: Whether it’s Thanksgiving or just a regular Tuesday, this crisp fits any event.
- Make-Ahead Friendly: You can prepare it ahead of time and bake it just before serving for maximum freshness.
Tools and Preparation
To create your Mouthwatering Apple Crisp with Canned Apple Filling, you’ll need some essential tools to make the process smooth and enjoyable.
Essential Tools and Equipment
- Mixing bowl
- Measuring cups
- Measuring spoons
- Baking dish
Importance of Each Tool
- Mixing bowl: A large mixing bowl allows you to easily combine ingredients without mess.
- Measuring cups: Precise measurements ensure your dessert turns out perfectly every time.
- Baking dish: A sturdy baking dish holds all your delicious layers together while baking evenly.
Ingredients
For the Filling
- 2 cans apple pie filling (40 oz total)
For the Topping
- 1 1/2 cups all-purpose flour
- 1 1/2 cups old-fashioned oats
- 1 cup packed brown sugar
- 1 tsp ground cinnamon
- 1/4 tsp salt
- 3/4 cup melted butter
How to Make Mouthwatering Apple Crisp with Canned Apple Filling
Step 1: Preheat the Oven
Preheat your oven to 350°F (175°C). This ensures that the apple crisp bakes evenly.
Step 2: Prepare the Filling
In a baking dish, spread out the apple pie filling. Make sure it covers the bottom evenly.
Step 3: Make the Topping
In a mixing bowl, combine the following:
1. All-purpose flour
2. Old-fashioned oats
3. Brown sugar
4. Ground cinnamon
5. Salt
Stir these dry ingredients together until well mixed. Then pour in the melted butter, stirring until everything is combined into a crumbly mixture.
Step 4: Assemble and Bake
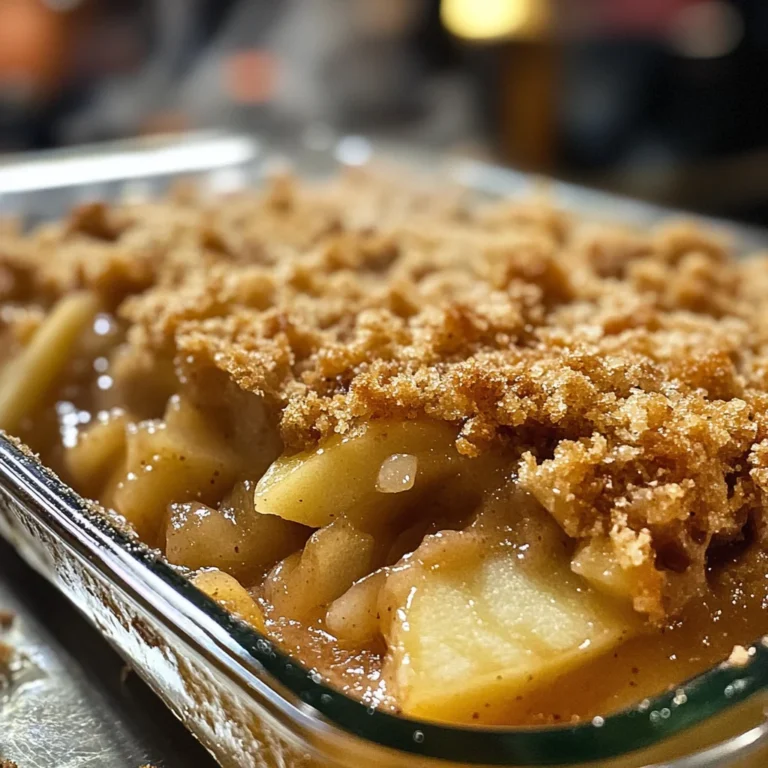
Spread the topping mixture evenly over the apple filling in the baking dish. Bake in your preheated oven for about 30-35 minutes, or until the topping is golden brown and crispy.
Step 5: Serve and Enjoy
Allow your mouthwatering apple crisp to cool slightly before serving. Enjoy it warm on its own or with a scoop of vanilla ice cream!
How to Serve Mouthwatering Apple Crisp with Canned Apple Filling
Serving your Mouthwatering Apple Crisp with Canned Apple Filling can elevate your dessert experience. Here are some delightful serving suggestions to try!
Pair with Vanilla Ice Cream
- A scoop of creamy vanilla ice cream adds a rich contrast to the warm apple crisp, creating a perfect balance of temperatures.
Drizzle Caramel Sauce
- Warm caramel sauce drizzled over the top adds an extra layer of sweetness and a touch of indulgence.
Top with Whipped Cream
- Light and fluffy whipped cream can enhance the flavors, making each bite even more delightful.
Serve in Individual Cast Iron Skillets
- For a rustic presentation, serve each portion in its own cast iron skillet. This adds charm and keeps the dessert warm longer.
Add Chopped Nuts
- Sprinkle chopped walnuts or pecans on top for added crunch and a nutty flavor that complements the apples beautifully.
How to Perfect Mouthwatering Apple Crisp with Canned Apple Filling
Creating the perfect Mouthwatering Apple Crisp with Canned Apple Filling is all about attention to detail. Follow these tips to ensure your dessert turns out fantastic every time!
- Choose Quality Filling: Select high-quality canned apple filling for better flavor and texture.
- Adjust Sweetness: Taste before baking; you may want to reduce the sugar if your filling is already sweet.
- Use Cold Butter: Incorporating cold melted butter into the topping ensures a crispier texture.
- Don’t Overmix Topping: Mix the topping just until combined; overmixing can lead to a dense result instead of a crumbly one.
- Bake Until Golden Brown: Keep an eye on your crisp as it bakes; you want it golden brown on top for that perfect finish.
- Let It Cool Slightly: Allowing your crisp to cool for a few minutes before serving helps it set up nicely.
Best Side Dishes for Mouthwatering Apple Crisp with Canned Apple Filling
When enjoying your Mouthwatering Apple Crisp with Canned Apple Filling, consider these delightful side dishes to complete your meal.
- Fresh Fruit Salad: A medley of seasonal fruits provides a refreshing contrast to the warm dessert.
- Creamy Coleslaw: The crunchiness and tanginess of coleslaw balance out the sweetness of the crisp.
- Vanilla Yogurt Parfait: Layered yogurt, granola, and fruit create a light yet satisfying side dish.
- Savory Roasted Vegetables: Roasting vegetables like carrots and Brussels sprouts adds depth and earthiness to your meal.
- Cheese Platter: A selection of cheeses offers a savory counterpoint that pairs nicely with sweet desserts.
- Spiced Nuts: Roasted spiced nuts add protein and crunch, enhancing the overall flavor experience.
Common Mistakes to Avoid
When making your Mouthwatering Apple Crisp with Canned Apple Filling, it’s essential to avoid common pitfalls that can affect the final dish.
- Ignoring the oven temperature: Always preheat your oven before baking. An improperly heated oven can lead to uneven cooking.
- Overmixing the topping: Stir just until combined. Overmixing can result in a dense topping rather than a crispy one.
- Not using enough cinnamon: Cinnamon adds warmth and flavor. Make sure to measure it correctly for the best taste.
- Skipping the salt: A pinch of salt balances sweetness and enhances flavors. Don’t skip this crucial ingredient.
- Neglecting to cool before serving: Allow your apple crisp to cool slightly. This helps the filling thicken and makes serving easier.
Storage & Reheating Instructions
Refrigerator Storage
- Store in an airtight container for up to 4 days.
- Make sure it’s completely cooled before sealing to prevent moisture buildup.
Freezing Mouthwatering Apple Crisp with Canned Apple Filling
- Freeze in an airtight container for up to 3 months.
- Wrap tightly with plastic wrap before placing it in a container for best results.
Reheating Mouthwatering Apple Crisp with Canned Apple Filling
- Oven: Preheat to 350°F (175°C) and bake for about 15-20 minutes until warmed through.
- Microwave: Heat on medium power for 1-2 minutes, checking every 30 seconds until hot.
- Stovetop: Place in a skillet over low heat, stirring occasionally until warmed through.
Frequently Asked Questions
Here are some common questions about preparing the Mouthwatering Apple Crisp with Canned Apple Filling that may help you out.
Can I use fresh apples instead of canned filling?
Yes, you can use fresh apples! Just peel, slice, and cook them down with sugar and spices until soft before adding them as filling.
What should I serve with my apple crisp?
A scoop of vanilla ice cream or whipped cream pairs wonderfully with your mouthwatering apple crisp!
How do I make my apple crisp gluten-free?
Substitute all-purpose flour with a gluten-free flour blend. Ensure that your oats are certified gluten-free as well.
Can I customize the toppings for my apple crisp?
Absolutely! Feel free to add nuts, dried fruits, or even coconut flakes for added texture and flavor.
Final Thoughts
This Mouthwatering Apple Crisp with Canned Apple Filling is perfect for any occasion, bringing warmth and comfort during cooler months. Its versatility allows for various customization options, so feel free to experiment with toppings! Give it a try and enjoy this delightful dessert.
Mouthwatering Apple Crisp with Canned Apple Filling
Indulge in the cozy flavors of fall with this Mouthwatering Apple Crisp with Canned Apple Filling. This easy-to-make dessert combines sweet canned apple filling with a buttery oat topping, creating a delightful treat that’s perfect for family gatherings or quiet nights at home. With minimal prep time and delicious results, it’s an ideal way to enjoy comforting autumn flavors without spending hours in the kitchen. Serve warm with vanilla ice cream or enjoy it on its own for a satisfying dessert experience any day of the week.
- Total Time: 50 minutes
- Yield: Serves 8
Ingredients
- 2 cans apple pie filling (40 oz total)
- 1 1/2 cups all-purpose flour
- 1 1/2 cups old-fashioned oats
- 1 cup packed brown sugar
- 1 tsp ground cinnamon
- 1/4 tsp salt
- 3/4 cup melted butter
Instructions
- Preheat your oven to 350°F (175°C).
- Spread the apple pie filling evenly in a baking dish.
- In a mixing bowl, combine flour, oats, brown sugar, cinnamon, and salt. Stir together before adding melted butter until crumbly.
- Evenly distribute the topping mixture over the apple filling.
- Bake for approximately 30–35 minutes, or until the topping is golden brown and crispy.
- Allow to cool slightly before serving warm.
- Prep Time: 15 minutes
- Cook Time: 35 minutes
- Category: Dessert
- Method: Baking
- Cuisine: American
Nutrition
- Serving Size: 1 serving
- Calories: 320
- Sugar: 22g
- Sodium: 145mg
- Fat: 14g
- Saturated Fat: 8g
- Unsaturated Fat: 5g
- Trans Fat: 0g
- Carbohydrates: 48g
- Fiber: 3g
- Protein: 3g
- Cholesterol: 30mg