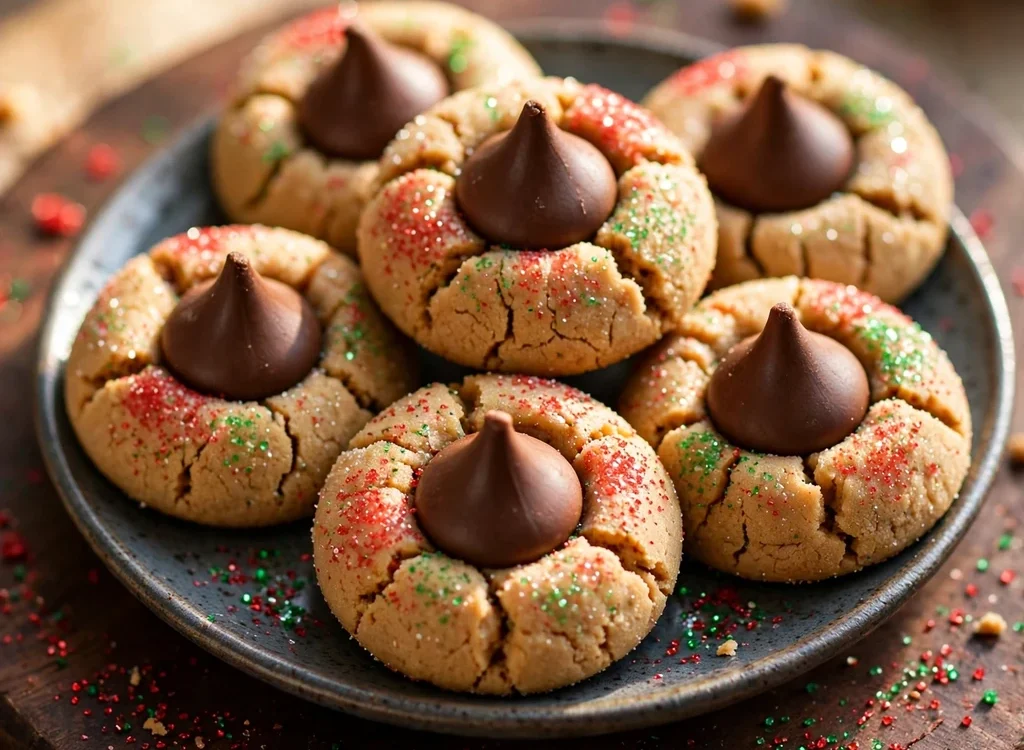
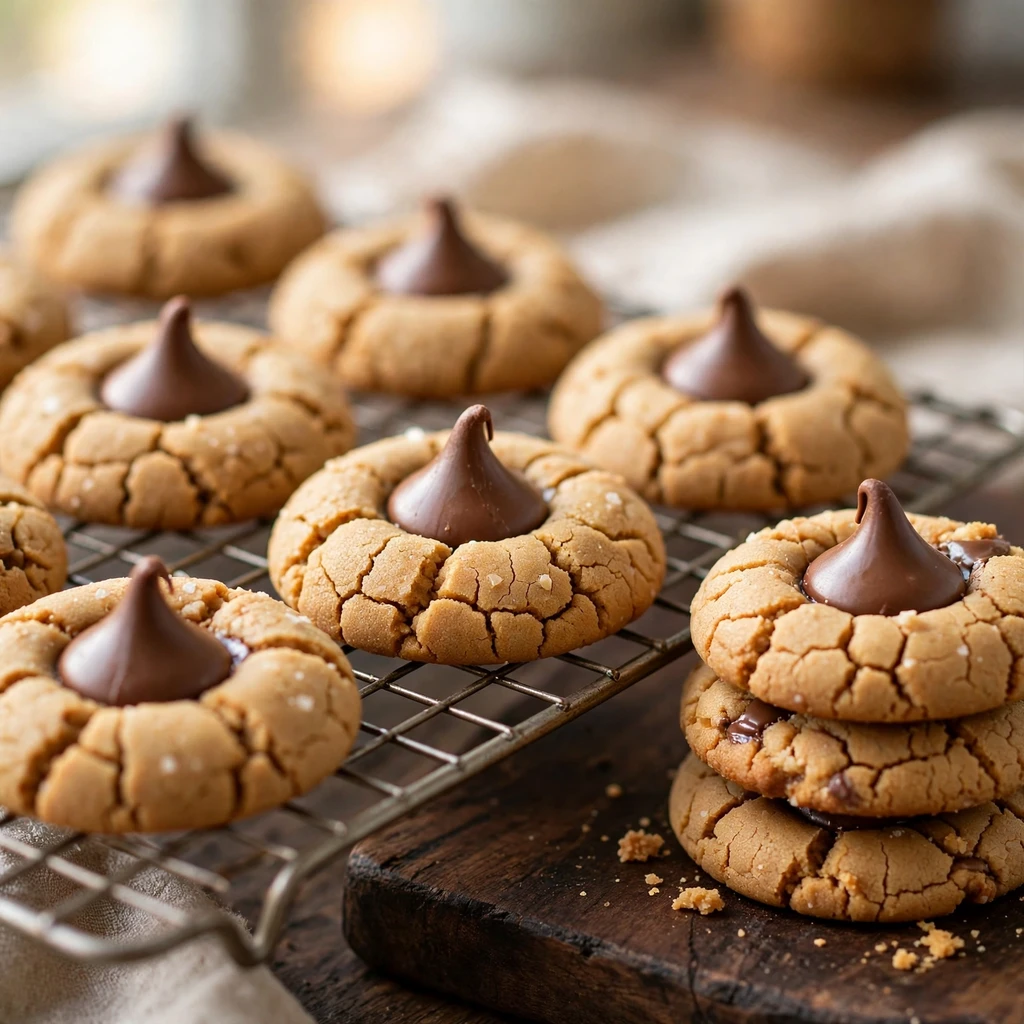
Traditional Christmas Peanut Butter Blossoms are the cookie that makes Christmas feel complete. These classic treats bring together chewy peanut butter cookies with a chocolate kiss pressed right in the center, creating that sweet-and-salty balance everyone loves. They are simple to make with basic pantry ingredients, and the kids can help press the chocolate kisses on top while the cookies are still warm from the oven.
Why You’ll Love This Recipe
- Quick and Easy: These cookies come together in under 40 minutes, perfect for last-minute holiday baking or when you need a sweet treat fast.
- Classic Flavor Combination: The peanut butter cookie base paired with a chocolate kiss on top is a timeless combo that never gets old.
- Festive and Fun: With optional red, green, and white sparkling sugar, these cookies look just as good as they taste and bring holiday spirit to your cookie plate.
- Simple Ingredients: You probably already have most of these pantry staples on hand, so you can whip up a batch whenever the craving hits.
- Kid-Friendly: Pressing the chocolate kisses into the warm cookies is a fun job for little helpers, making this a great recipe to bake together as a family.
Tools and Preparation
To make your Traditional Christmas Peanut Butter Blossoms, having the right tools can enhance your baking experience. Here are some essentials you’ll need:
Essential Tools and Equipment
- Mixing bowl
- Hand mixer or stand mixer
- Baking sheet
- Parchment paper
- Cookie scoop
- Wire rack
- Measuring cups
- Measuring spoons
Importance of Each Tool
- Mixing bowl: A large bowl allows enough space to cream the butter and sugars without spillage.
- Baking sheet: A sturdy, flat baking sheet ensures even baking and helps the cookies hold their shape.
- Cookie scoop: Portions the dough evenly so every cookie bakes at the same rate.
- Wire rack: Lets air circulate under the cookies so they cool evenly without getting soggy on the bottom.
Ingredients
For the Peanut Butter Blossoms
- 1/2 cup unsalted butter (softened)
- 1/2 cup granulated sugar
- 1/2 cup packed brown sugar
- 1/2 cup smooth peanut butter
- 1/2 teaspoon vanilla extract
- 1 large egg
- 1 1/4 cups plus 3 tablespoons all-purpose flour
- 1/2 teaspoon salt
- 1/2 teaspoon baking soda
- 24 Hershey’s milk chocolate kisses (unwrapped)
- Red, green, and white sparkling sugar (optional)
How to Make Traditional Christmas Peanut Butter Blossoms
Step 1: Preheat the Oven and Prepare the Baking Sheet
Preheat your oven to 375°F (190°C) so it will be at the right temperature when you are ready to bake. Meanwhile, line a baking sheet with parchment paper to ensure the cookies won’t stick.
Step 2: Cream the Butter, Sugars, and Peanut Butter
In a large mixing bowl, cream together the softened butter, granulated sugar, and packed brown sugar using a hand mixer or a stand mixer with the paddle attachment. Beat until the mixture is light and fluffy, which usually takes about 2-3 minutes. Add in the peanut butter and vanilla extract, mixing until thoroughly combined. Finally, stir in the egg just until incorporated, and don’t overmix after adding the egg.
Step 3: Mix the Dry Ingredients and Chill the Dough
In a separate bowl, sift together the all-purpose flour, salt, and baking soda. Gradually add the sifted dry ingredients into the wet mixture, mixing until just combined and a soft dough forms. Chill the dough in the refrigerator for 30 minutes to help the cookies hold their shape while baking.
Step 4: Shape the Dough and Roll in Sugar
Once the dough is chilled, use a mounded tablespoon or a cookie scoop to portion out the dough. Form each scoop into a ball with your hands. For a festive touch, roll the dough balls in red, green, and white sparkling sugar before evenly spacing them out on the baking sheet.
Step 5: Bake the Cookies
Bake the cookie dough balls in the preheated oven for 6-10 minutes. Bake for 6 minutes for very chewy cookies, or up to 10 minutes for crispier cookies. Watch the cookies carefully near the end of the bake time, as peanut butter blossoms can overbake quickly.
Step 6: Press in the Chocolate Kisses and Cool
As soon as you remove the cookies from the oven, immediately press a Hershey’s milk chocolate kiss into the center of each warm cookie. Transfer the cookies to a wire rack to cool completely before enjoying.
This simple recipe makes enjoying homemade peanut butter blossoms easy and rewarding!
How to Serve Traditional Christmas Peanut Butter Blossoms
Serving Traditional Christmas Peanut Butter Blossoms offers delightful opportunities for customization and enjoyment. These cookies are perfect on their own, but they are even better as part of a holiday spread.
Toppings
- Sparkling Sugar: Roll the dough balls in red, green, and white sparkling sugar before baking for extra holiday sparkle and crunch.
- Chocolate Drizzle: Drizzle melted chocolate over the cooled cookies for an extra chocolatey finish.
- Crushed Candy Canes: Sprinkle a few crushed candy canes over the cookies for a festive peppermint crunch.
Pairings
- Cold Milk: A cold glass of milk is pretty much required for dunking these sweet and salty treats.
- Hot Chocolate: A warm mug of hot chocolate pairs beautifully with the peanut butter and chocolate flavors.
- Coffee: Enjoy with your favorite coffee for a cozy afternoon treat or after-dinner dessert.
How to Perfect Traditional Christmas Peanut Butter Blossoms
To ensure your Traditional Christmas Peanut Butter Blossoms turn out perfectly every time, consider these helpful tips.
- Use Creamy Stabilized Peanut Butter: Regular store-brand peanut butter like Jif or Skippy works best. Natural peanut butter is oilier and can make your cookies spread too much or turn out greasy.
- Don’t Overbake: The cookies should look slightly underdone when you pull them out at around 8-10 minutes, as they will continue to firm up on the baking sheet and stay chewy in the center.
- Press the Kisses Immediately: Add the chocolate kisses right after removing the cookies from the oven while they are still soft, so the kisses nestle in perfectly without the cookies cracking.
- Chill the Dough: If the dough feels too soft to handle, don’t skip the 30-minute chill. It helps the cookies hold their shape and prevents spreading.
Best Side Dishes for Traditional Christmas Peanut Butter Blossoms
Pairing your Traditional Christmas Peanut Butter Blossoms with delicious accompaniments enhances their enjoyment. Here are some great options.
- A Glass of Cold Milk: The classic partner for cookies, perfect for dunking.
- Hot Chocolate: Rich and warm, hot chocolate complements the peanut butter and chocolate flavors beautifully.
- Vanilla Ice Cream: Crumble a few cookies over vanilla ice cream for an easy dessert that everyone will love.
- Fresh Fruit: Sliced apples or berries add a fresh, light contrast to the rich cookies.
- Coffee or Espresso: A strong coffee balances the sweetness and makes these cookies feel like a grown-up treat.
- A Holiday Cookie Platter: Serve alongside sugar cookies, gingerbread men, and snickerdoodles for a festive cookie exchange or gift box.
Common Mistakes to Avoid
When making Traditional Christmas Peanut Butter Blossoms, beginners often make a few common mistakes that can affect the final product. Here are some to watch out for:
- Pressing the kisses at the wrong time – Adding the chocolate kisses too early or too late means they won’t nestle in properly. Press them in immediately after removing the cookies from the oven while they are still soft.
- Skipping the sugar roll – Rolling the dough in sugar not only adds sweetness but also creates that signature crackled appearance and prevents the cookies from spreading too thin.
- Using melted butter – Melted butter leads to flat, greasy cookies. Make sure your butter is softened but not melted.
- Overbaking the cookies – These cookies should look slightly underdone when you pull them out. Overbaking makes them dry and hard instead of soft and chewy.
- Skipping the chill – If the dough feels soft, chilling it for 30 minutes helps the cookies hold their shape while baking.
Storage & Reheating Instructions
Refrigerator Storage
- Store your Traditional Christmas Peanut Butter Blossoms in an airtight container at room temperature for up to 1 week.
- Layer the cookies between sheets of parchment paper so the chocolate kisses don’t get smooshed.
- They actually taste even better the next day once the flavors have had time to meld together.
Freezing Traditional Christmas Peanut Butter Blossoms
- Let the cookies cool completely, then pack them in a freezer-safe container or bag.
- They freeze really well for up to 3 months.
- You can freeze them with or without the chocolate kisses on top, whatever works best for you.
Reheating Traditional Christmas Peanut Butter Blossoms
- Room Temperature – Let frozen cookies sit at room temperature for about 30 minutes. They will taste like you just baked them.
- Microwave – Place a cookie on a microwave-safe plate and heat for 5-10 seconds for a warm, soft cookie.
- Oven – Warm cookies in a 300°F (150°C) oven for 2-3 minutes if you want them fresh from the oven.
Frequently Asked Questions
What kind of peanut butter should I use?
Stick with creamy peanut butter rather than chunky so the cookies have a smooth, even texture. Regular store-brand peanut butter like Jif or Skippy works perfectly and is actually better than natural peanut butter here, which tends to be oilier and can make your cookies spread too much.
Can I use crunchy peanut butter?
Yes! Crunchy peanut butter works fine if that is what you have on hand. Just know your cookies will have little peanut bits throughout, which adds a nice crunch.
When should I press in the chocolate kisses?
Press the kisses into the cookies immediately after removing them from the oven, while they are still soft and warm. This lets the kisses nestle in perfectly without cracking the cookies.
Can I make the dough ahead of time?
Absolutely! You can chill the dough in the refrigerator for up to 24 hours, or roll it into balls and freeze them for up to 3 months. Bake the frozen dough balls straight from the freezer, adding 1-2 extra minutes to the bake time.
How do I keep the cookies soft?
Don’t overbake them, and store them in an airtight container as soon as they are cool. A slice of bread tucked into the container can also help keep the cookies soft for days.
Final Thoughts
Traditional Christmas Peanut Butter Blossoms are not only simple to make but also incredibly festive! With their chewy peanut butter base, sparkling sugar coating, and chocolate kiss on top, they are sure to please everyone at your holiday table. Give this recipe a try and enjoy its delightful flavors, perfect for cookie exchanges, gift boxes, and Christmas morning.
Traditional Christmas Peanut Butter Blossoms

Traditional Christmas Peanut Butter Blossoms are the cookie that makes Christmas feel complete. These classic treats bring together chewy peanut butter cookies with a chocolate kiss pressed right in the center, creating that sweet-and-salty balance everyone loves. They are simple to make with basic pantry ingredients, and the kids can help press the chocolate kisses on top while the cookies are still warm from the oven.
Ingredients
Instructions
- Preheat your oven to 375°F (190°C) so it will be at the right temperature when you are ready to bake. Meanwhile, line a baking sheet with parchment paper to ensure the cookies won't stick.
- In a large mixing bowl, cream together the softened butter, granulated sugar, and packed brown sugar using a hand mixer or a stand mixer with the paddle attachment. Beat until the mixture is light and fluffy, which usually takes about 2-3 minutes. Add in the peanut butter and vanilla extract, mixing until thoroughly combined. Finally, stir in the egg just until incorporated, and don't overmix after adding the egg.
- In a separate bowl, sift together the all-purpose flour, salt, and baking soda. Gradually add the sifted dry ingredients into the wet mixture, mixing until just combined and a soft dough forms. Chill the dough in the refrigerator for 30 minutes to help the cookies hold their shape while baking.
- Once the dough is chilled, use a mounded tablespoon or a cookie scoop to portion out the dough. Form each scoop into a ball with your hands. For a festive touch, roll the dough balls in red, green, and white sparkling sugar before evenly spacing them out on the baking sheet.
- Bake the cookie dough balls in the preheated oven for 6-10 minutes. Bake for 6 minutes for very chewy cookies, or up to 10 minutes for crispier cookies. Watch the cookies carefully near the end of the bake time, as peanut butter blossoms can overbake quickly.
- As soon as you remove the cookies from the oven, immediately press a Hershey's milk chocolate kiss into the center of each warm cookie. Transfer the cookies to a wire rack to cool completely before enjoying.
Recipe Notes & Storage Tips
Store your Traditional Christmas Peanut Butter Blossoms in an airtight container at room temperature for up to 1 week. Layer the cookies between sheets of parchment paper so the chocolate kisses don't get smooshed. They actually taste even better the next day once the flavors have had time to meld together. Let the cookies cool completely, then pack them in a freezer-safe container or bag. They freeze really well for up to 3 months. You can freeze them with or without the chocolate kisses on top, whatever works best for you. Room Temperature – Let frozen cookies sit at room temperature for about 30 minutes. They will taste like you just baked them. Microwave – Place a cookie on a microwave-safe plate and heat for 5-10 seconds for a warm, soft cookie. Oven – Warm cookies in a 300°F (150°C) oven for 2-3 minutes if you want them fresh from the oven.